Sharpen Up!
A full breakdown of how to sharpen your ice tools
The early season ice climbing in Silverton and the higher elevations in the San Juans havs been good so far, but as always there are places where the ice is thin. Normally we can see these indicators, or tread lightly in obvious spots such as at topouts, but if you’ve been climbing long enough eventually you’ll feel that unmistakable sensation of the “doink!” where your ice tool’s pick goes through the thin ice and strikes the underlying rock. Like the saying goes, these are “tools not jewels” but like all tools, they work best when they are well tuned and in good condition. For ice axes, that means having all parts intact and keeping the blades of your picks nice and sharp. Let’s go over some tips for how to do that.
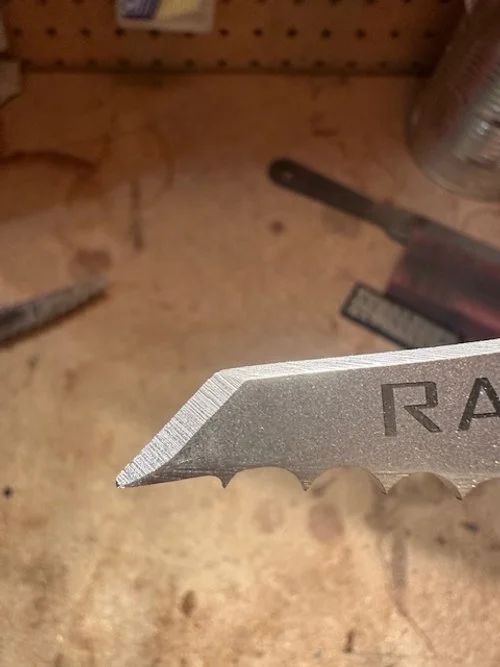
Not all picks are the same and some hold up to a beating more than others. Usually, the “meatier” your pick is, the more ice it displaces and can also be slightly more difficult to place in colder/more brittle ice. The thinner “razor” style picks penetrate ice with ease (especially when coupled with some appropriately placed head weights) but will ding up and loose their edge much more easily. There are other picks that bridge the gap and are made of much harder steel (e.g. Katana Ice) and are still relatively thin while also being much harder to dent. These are a good choice; however, the hard steel also means hard sharpening, so they take a lot more effort to maintain once they have been dinged.
Regardless of the pick type, the sharpening process is the same. While some will prefer the convenience and speed of using an electric grinder for the sharpening process, this generates high heat which can damage the metal’s temper, weakening the pick and making it more prone to further denting and even breakage. I prefer to sharpen mine by hand.
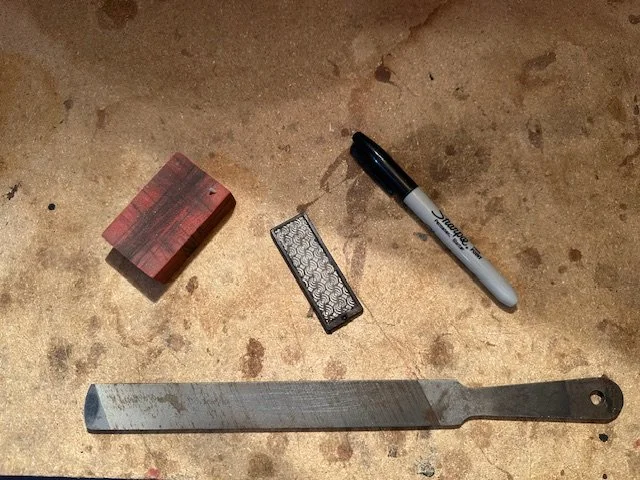
Tools needed
Medium-toothed (second cut) flat machinist file
Ski edge diamond stone
Ski edge gummy stone
Sharpie
New pick (optional)
Table vice (optional)
Gloves (optional)
The Sharpening Process
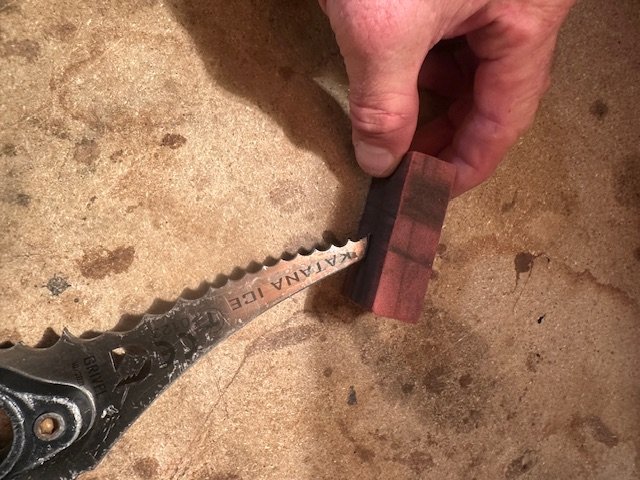
You’ll want to start by re-establishing the cutting edge as close to the original as possible. One way to do this is to use another new pick (or one that still retains a nice blade edge) and hold it right against the one you are sharpening. You can leave it in the head of the ax if you don’t want to remove it (I don’t like doing so) or you can take it out and work with it on its own, which can feel easier to not have the whole ax to handle. When you line the good blade up with the tip of the dented one, use the sharpie to mark on the pick where you want to re-establish the edge line. A good gauge of when to stop sharpening is often when you have removed all the marker ink. This way you’ll end up with consistent tip angles. Otherwise, over time it is easy for the tip to become less angled and straighter.

Next, start sharpening the tip with the file; pushing it down toward the pick in one direction (do not go back and forth with the file or you will damage its cutting edges). Try to maintain a consistent angle both with respect to side to side and the direction towards the tip. Do this for a while on one side, then repeat on the other. Go back and forth between the side until you get a sharp edge from the top all the way down to the tip that is equally beveled on each side. The tip area is usually the part that is dented the most so getting it sharp can take a while. Resist the temptation to just sharpen the tip. If you do this, your tips will have a rounded “butterknife” type appearance, and though sharp, will lack the good penetrating angle they came with.
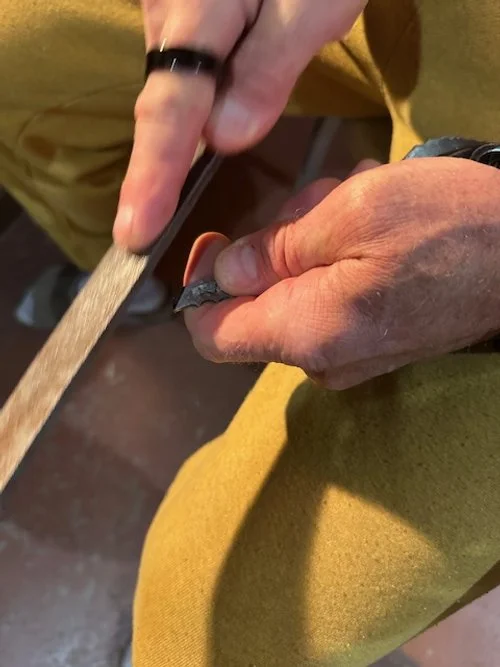
The file does the bulk of the work here and many people stop at this point. Because it is course and removes a lot of material it also leaves more deep gauges from the filing. This is where the diamond stone comes in. Just like sharpening the edges of skis, this can be used to provide a sharper, smoother and work hardened finish for even better performance and resilience. Unlike the file, the diamond stone can be rubbed on in both directions with no issues. This part takes very little time so it’s very worth doing. It will leave an incredibly thin and sharp edge on the blade. While that may seem like a good thing, the razor thin leading edge can more easily deform and dull. So, detuning it just a touch is nice. This is where the gummy stone comes in. Just rub it a few times on the edge. You should be able to feel that it is still sharp but not razor sharp.
Before you hang up the tools or strap them to your pack be sure to check the rest of the axe for loose bolts and make sure everything is secure.
Now your picks will be smooth and sharp: good to go for another knuckle bashing adventure. Just be more careful next time! I’ve been telling myself that for over thirty years, but still haven’t managed to come back with perfectly sharp blades every time.
You can do the same process with your crampons’ front points, though the side points require a bit of a different approach. More on that in future post, stay tuned.

Vince Anderson leading Mount Alberta’s North Face, trying not to ding up his picks!