How to Ice climb efficiently
Ice climbing rewards precise and efficient movement more than brute strength. Once you understand how to swing your ice tools, securely place your frontpoints, and position your bodyweight in a well-balanced and stable stance, steep routes become both attainable and more enjoyable. Skyward Mountaineering offers structured ice climbing courses throughout the winter in the Ouray Ice Park where we focus on progressing through various strategies to help climbers be efficient and deliberate with their ice climbing techniques. These courses are designed to follow the natural development of an ice climber learning the fundamentals, improving their technique on steeper routes, applying the skills to varied alpine terrain and eventually taking the sharp end and leading routes as a confident and capable climber. Or you may prefer a day of private ice climbing instruction to meet you where you’re currently at ability-wise, our guides provide personalized and attentive coaching so you can maximize your gains.
This “Learn How To Ice Climb Efficiently” blog post serves as a guide to some of the smart strategies to help you save energy and climb ice more securely - it’s not a replacement for professional, detail oriented instruction from our guides (we promise, it’s worth it). Perhaps it's a helpful checklist before the ice climbing season starts or an addendum to your day of climbing so you can better recall the techniques you’ve just practiced.
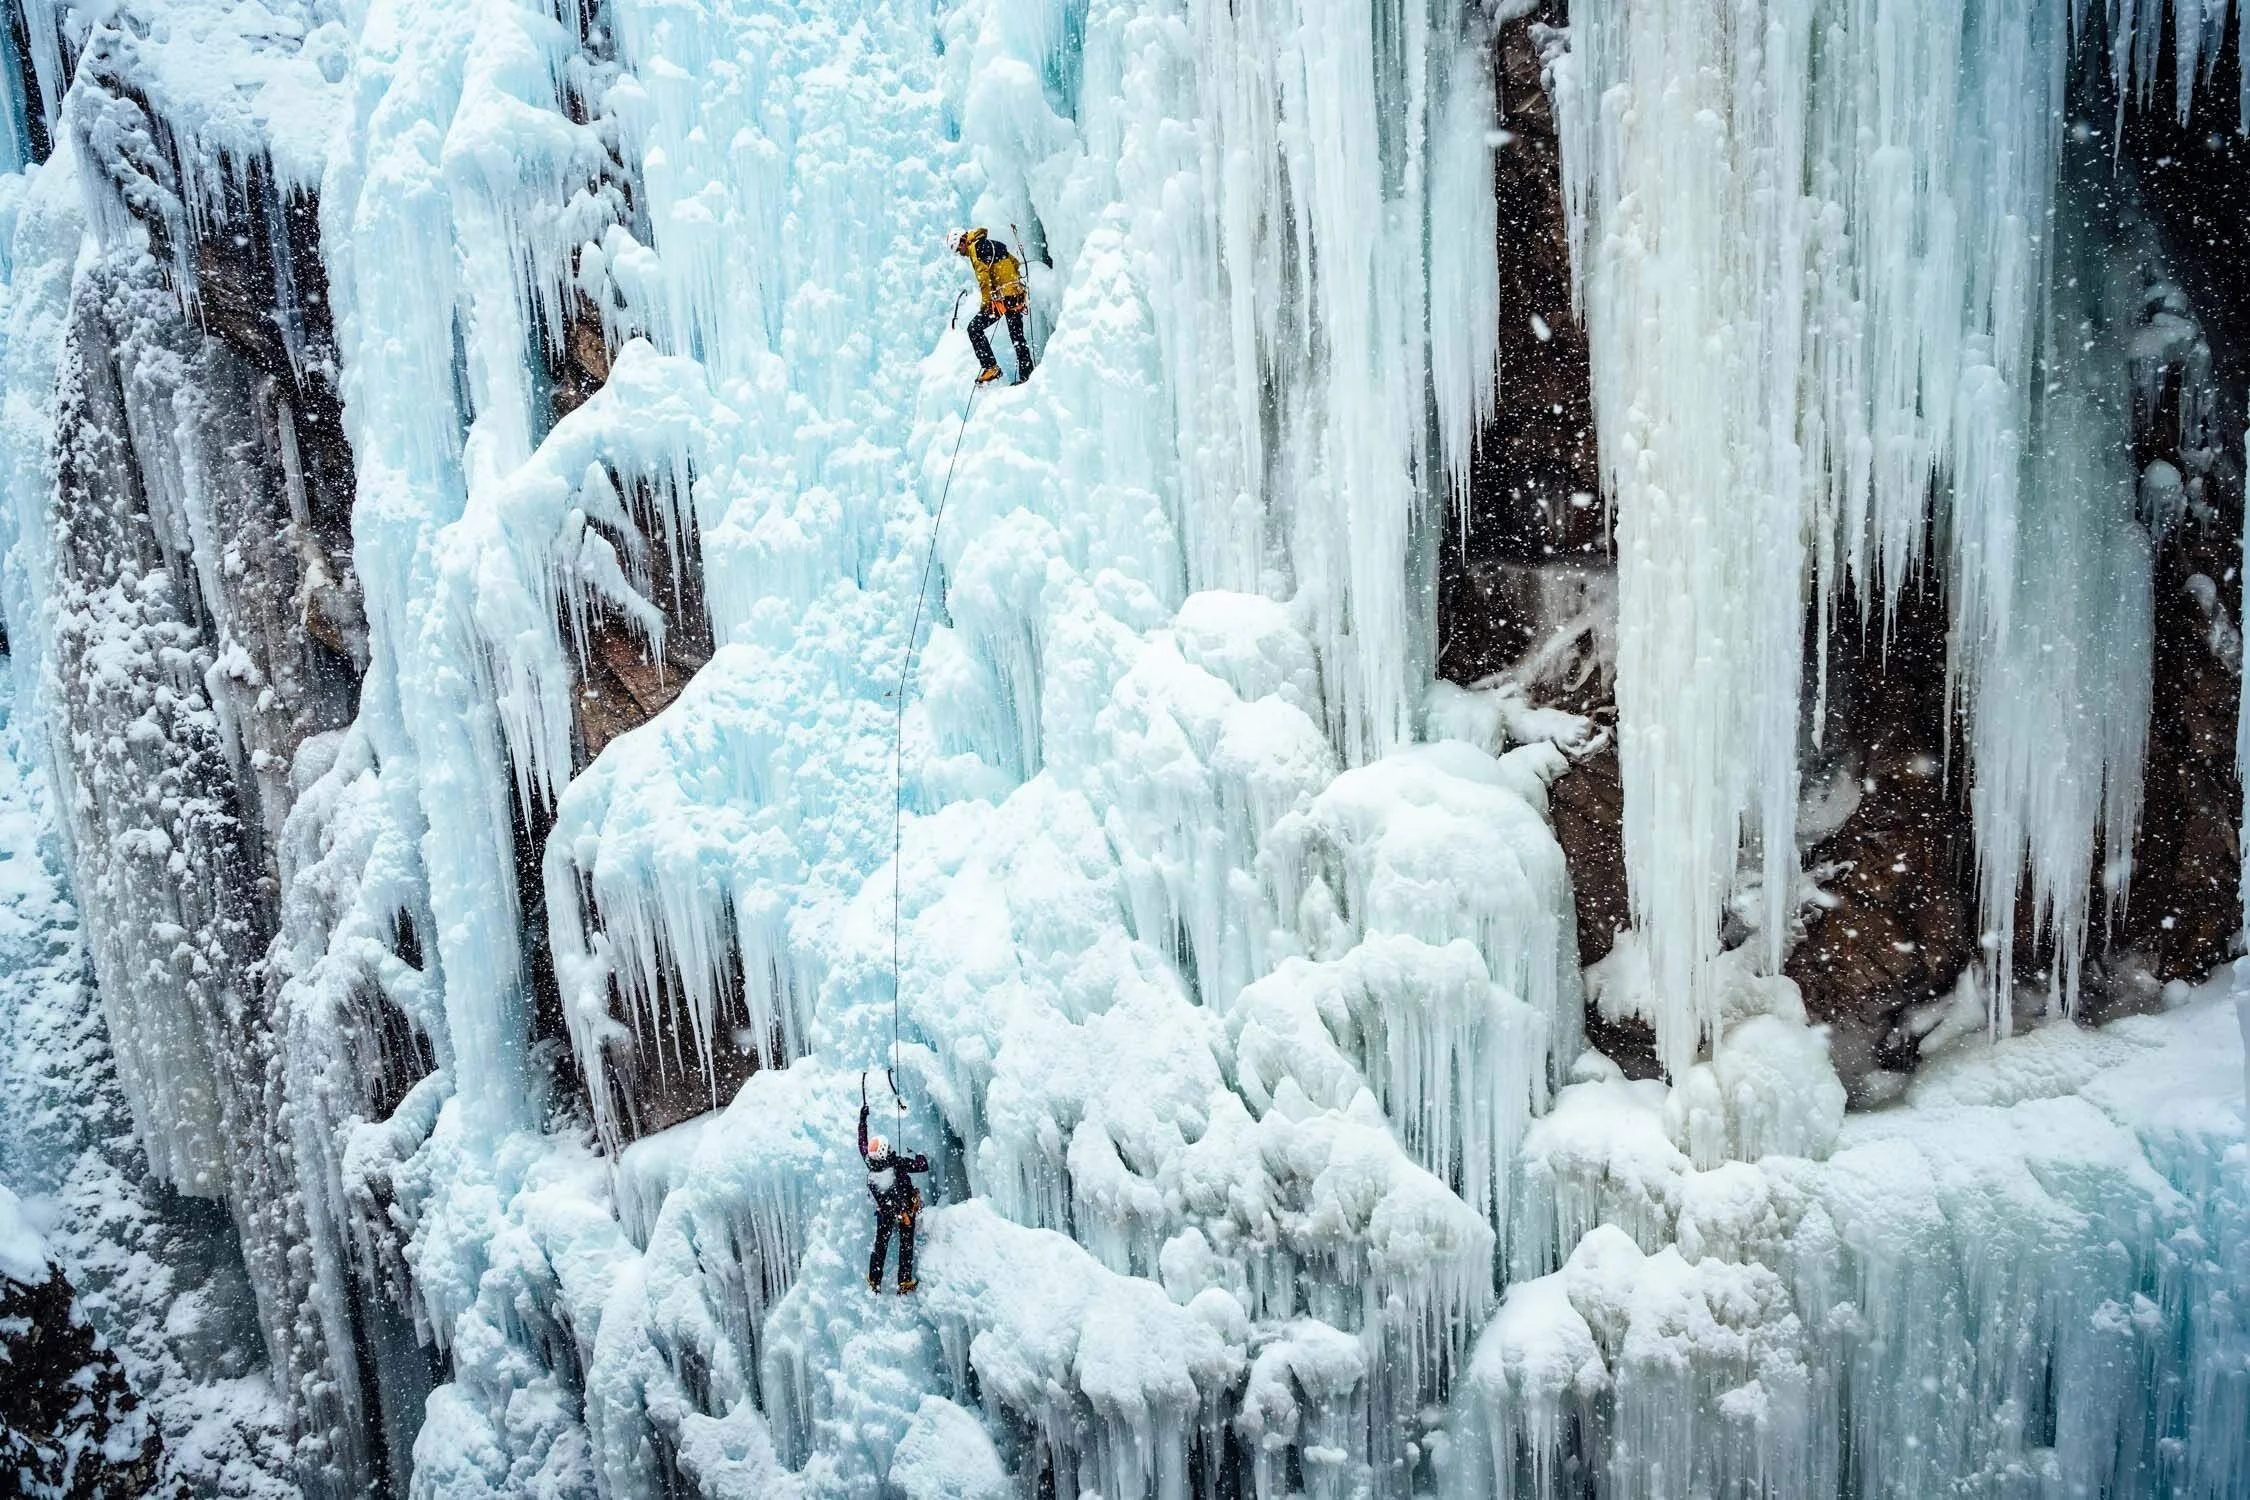
Ouray is arguably one of the world’s best venues for practicing ice climbing technique due to the ease of access and sheer quantity of varying ice climbing routes. This is the main reason our winter base of operations is in the San Juan mountains: we are privelaged to be able to instruct ice climbing courses in the Ouray Ice Park and guide the plethora of world class backcountry routes in Ouray and Silverton. We strongly recommend you too utilize this zone to hone your skills and then take those skills and apply them to bigger backcountry multipitch routes in remote areas like the Canadian Rockies, Cody, WY or alpine routes in Alaska or the Himalaya.
Creating a stable base: Start with solid footwork
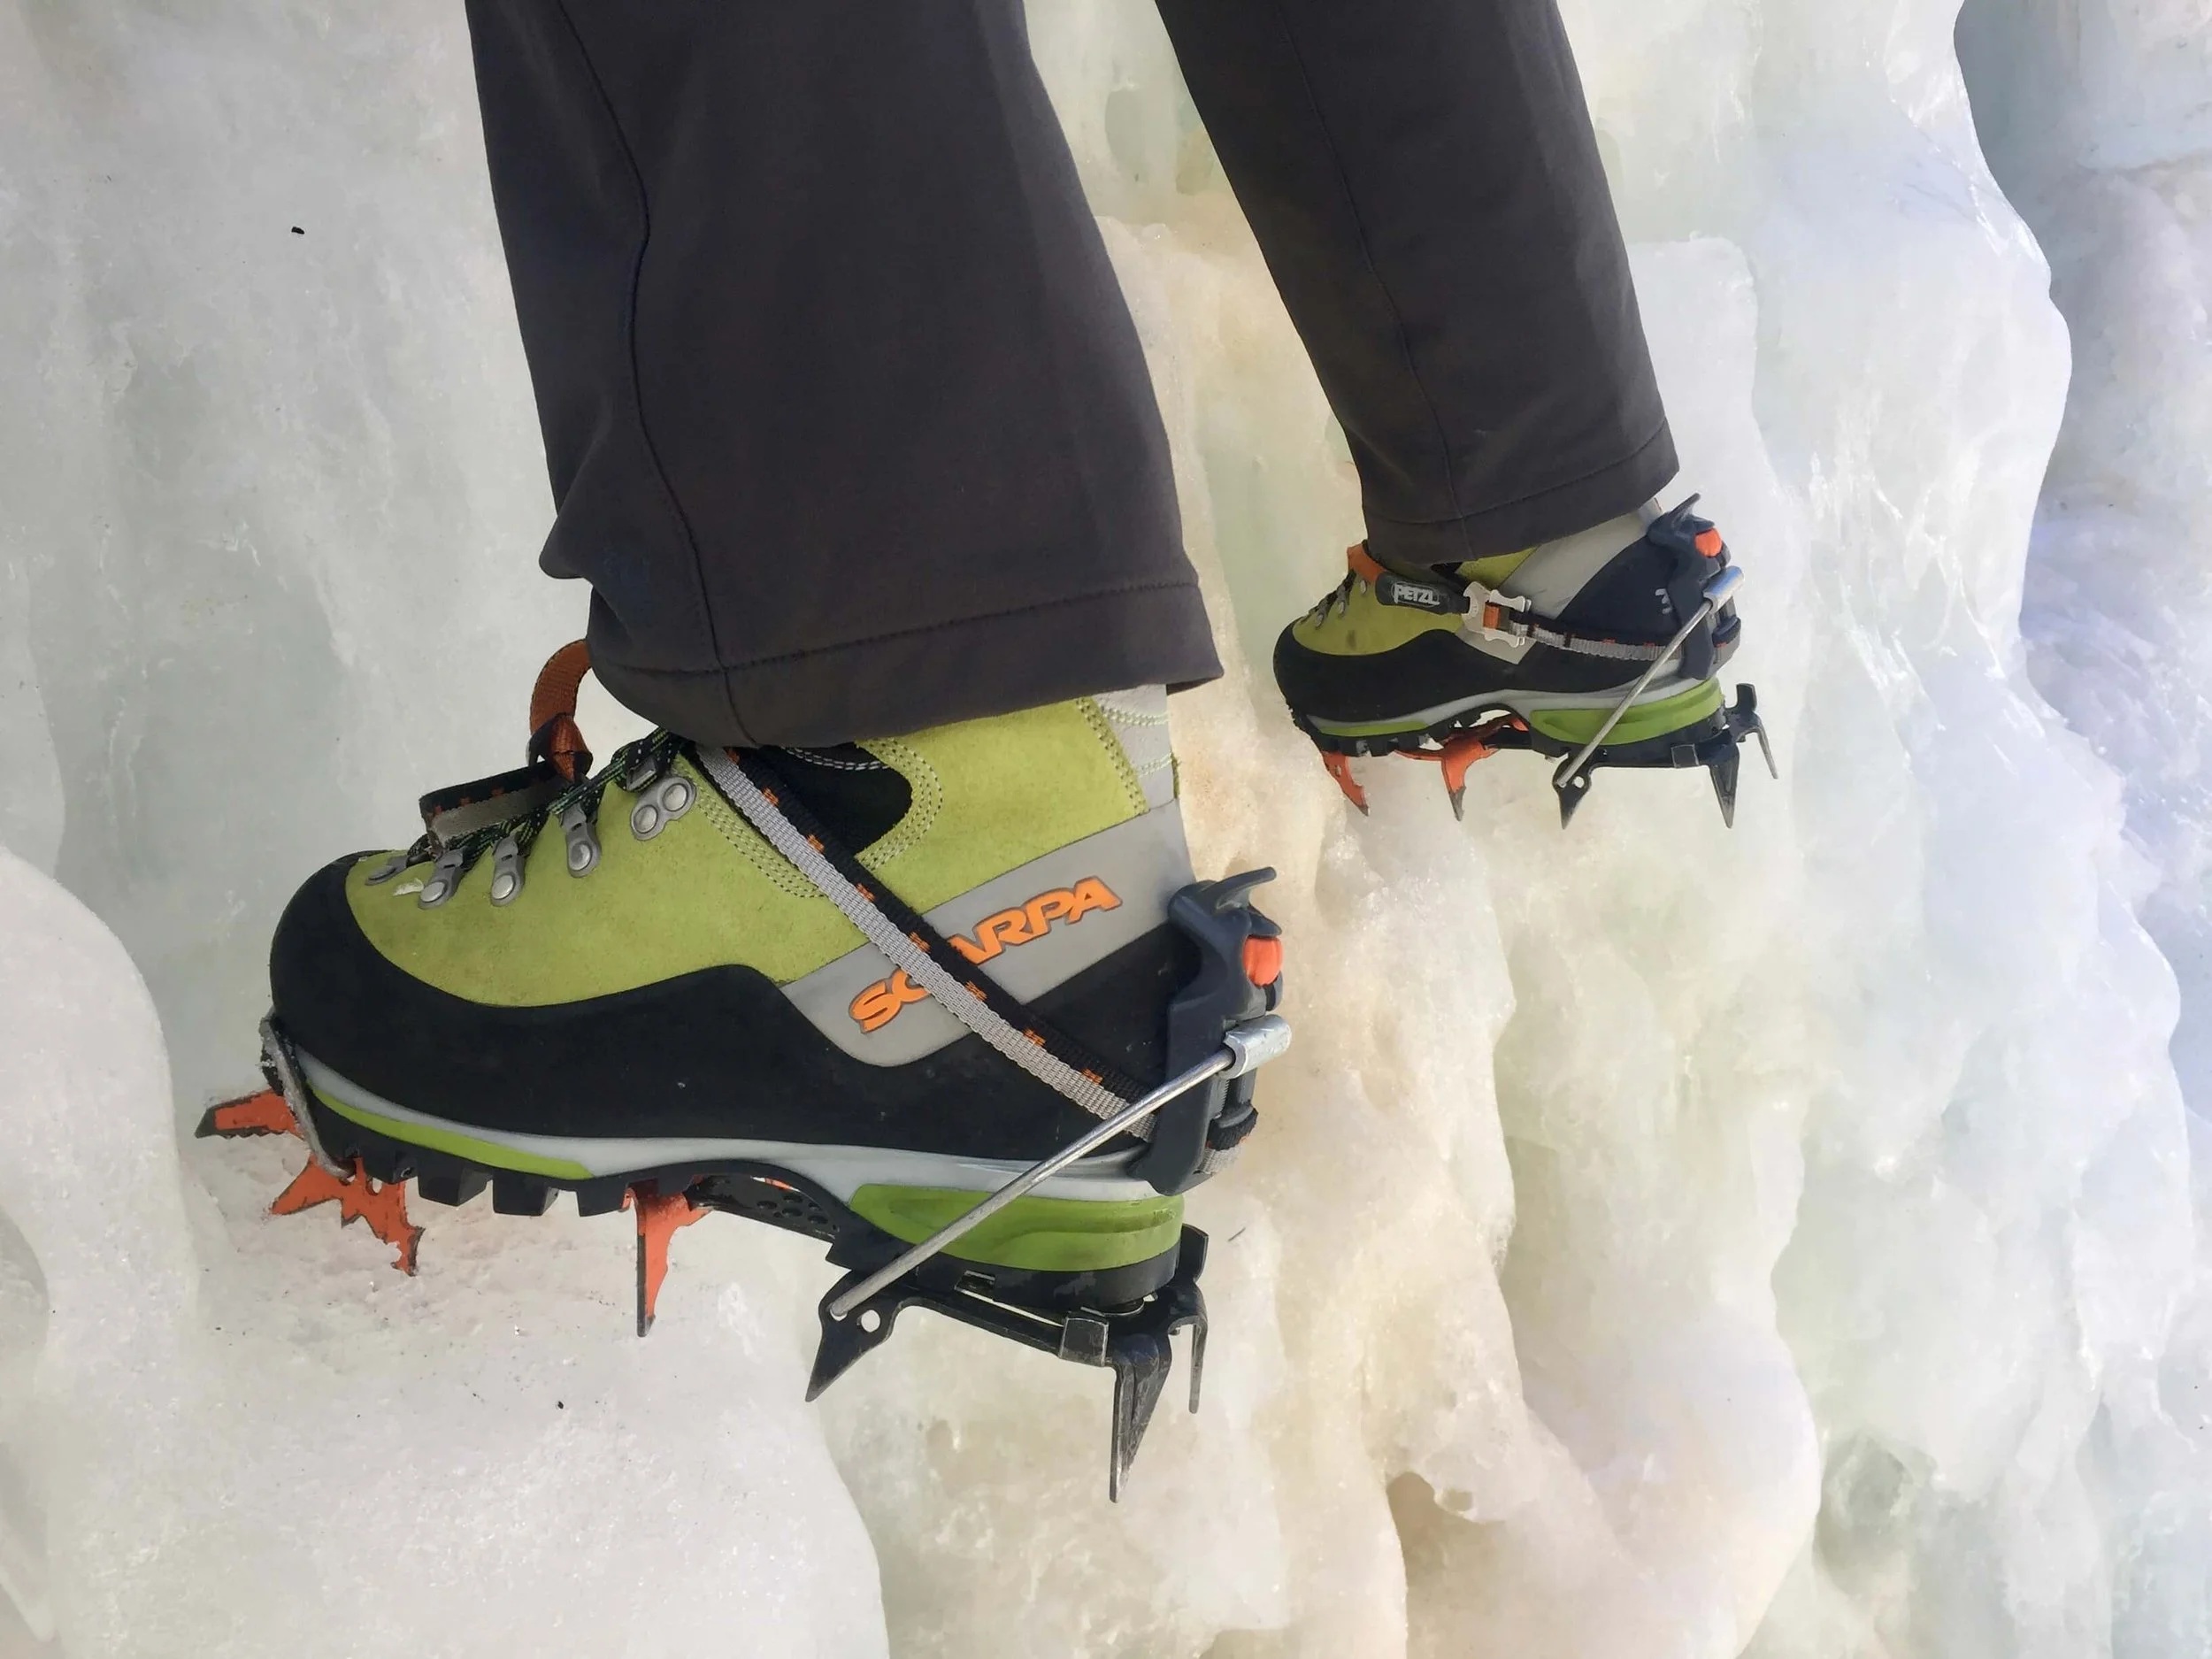
Our footwork sets the foundation for our body positioning and is instrumental for creating a base that allows us to feel stable and secure. Learning to kick your crampons into the ice efficiently means avoiding repetitive kicking and even over-gripping on the ice tools because you don’t really trust your feet.
Key techniques for solid crampon placements:
Sharpen those frontpoints! And your secondary points. Dull crampons mean you need to work harder to get secure placements. Frontpoints don’t tend to dull as quickly as the picks on your ice tools but they’re no less important.
If you can’t clearly see your feet, you won’t be able to kick them in securely either. Pull your hips away from the wall and create ample space to see the micro features of the terrain.
Hinge from your knees, not the hips. If you generate too much power the boot ends up contacting the ice and bouncing it back out of the placement. Strong and deliberate foot kicks, not Lionel Messi soccer ball kicks.
Use dorsiflexion to elevate your toes towards your shin when kicking. This will help ensure your frontpoints make direct contact without interference from the toe of your boot.
Aim to place your crampons perpendicular to the micro features of the ice, and be precise - details matter.
secure, precise tool placements
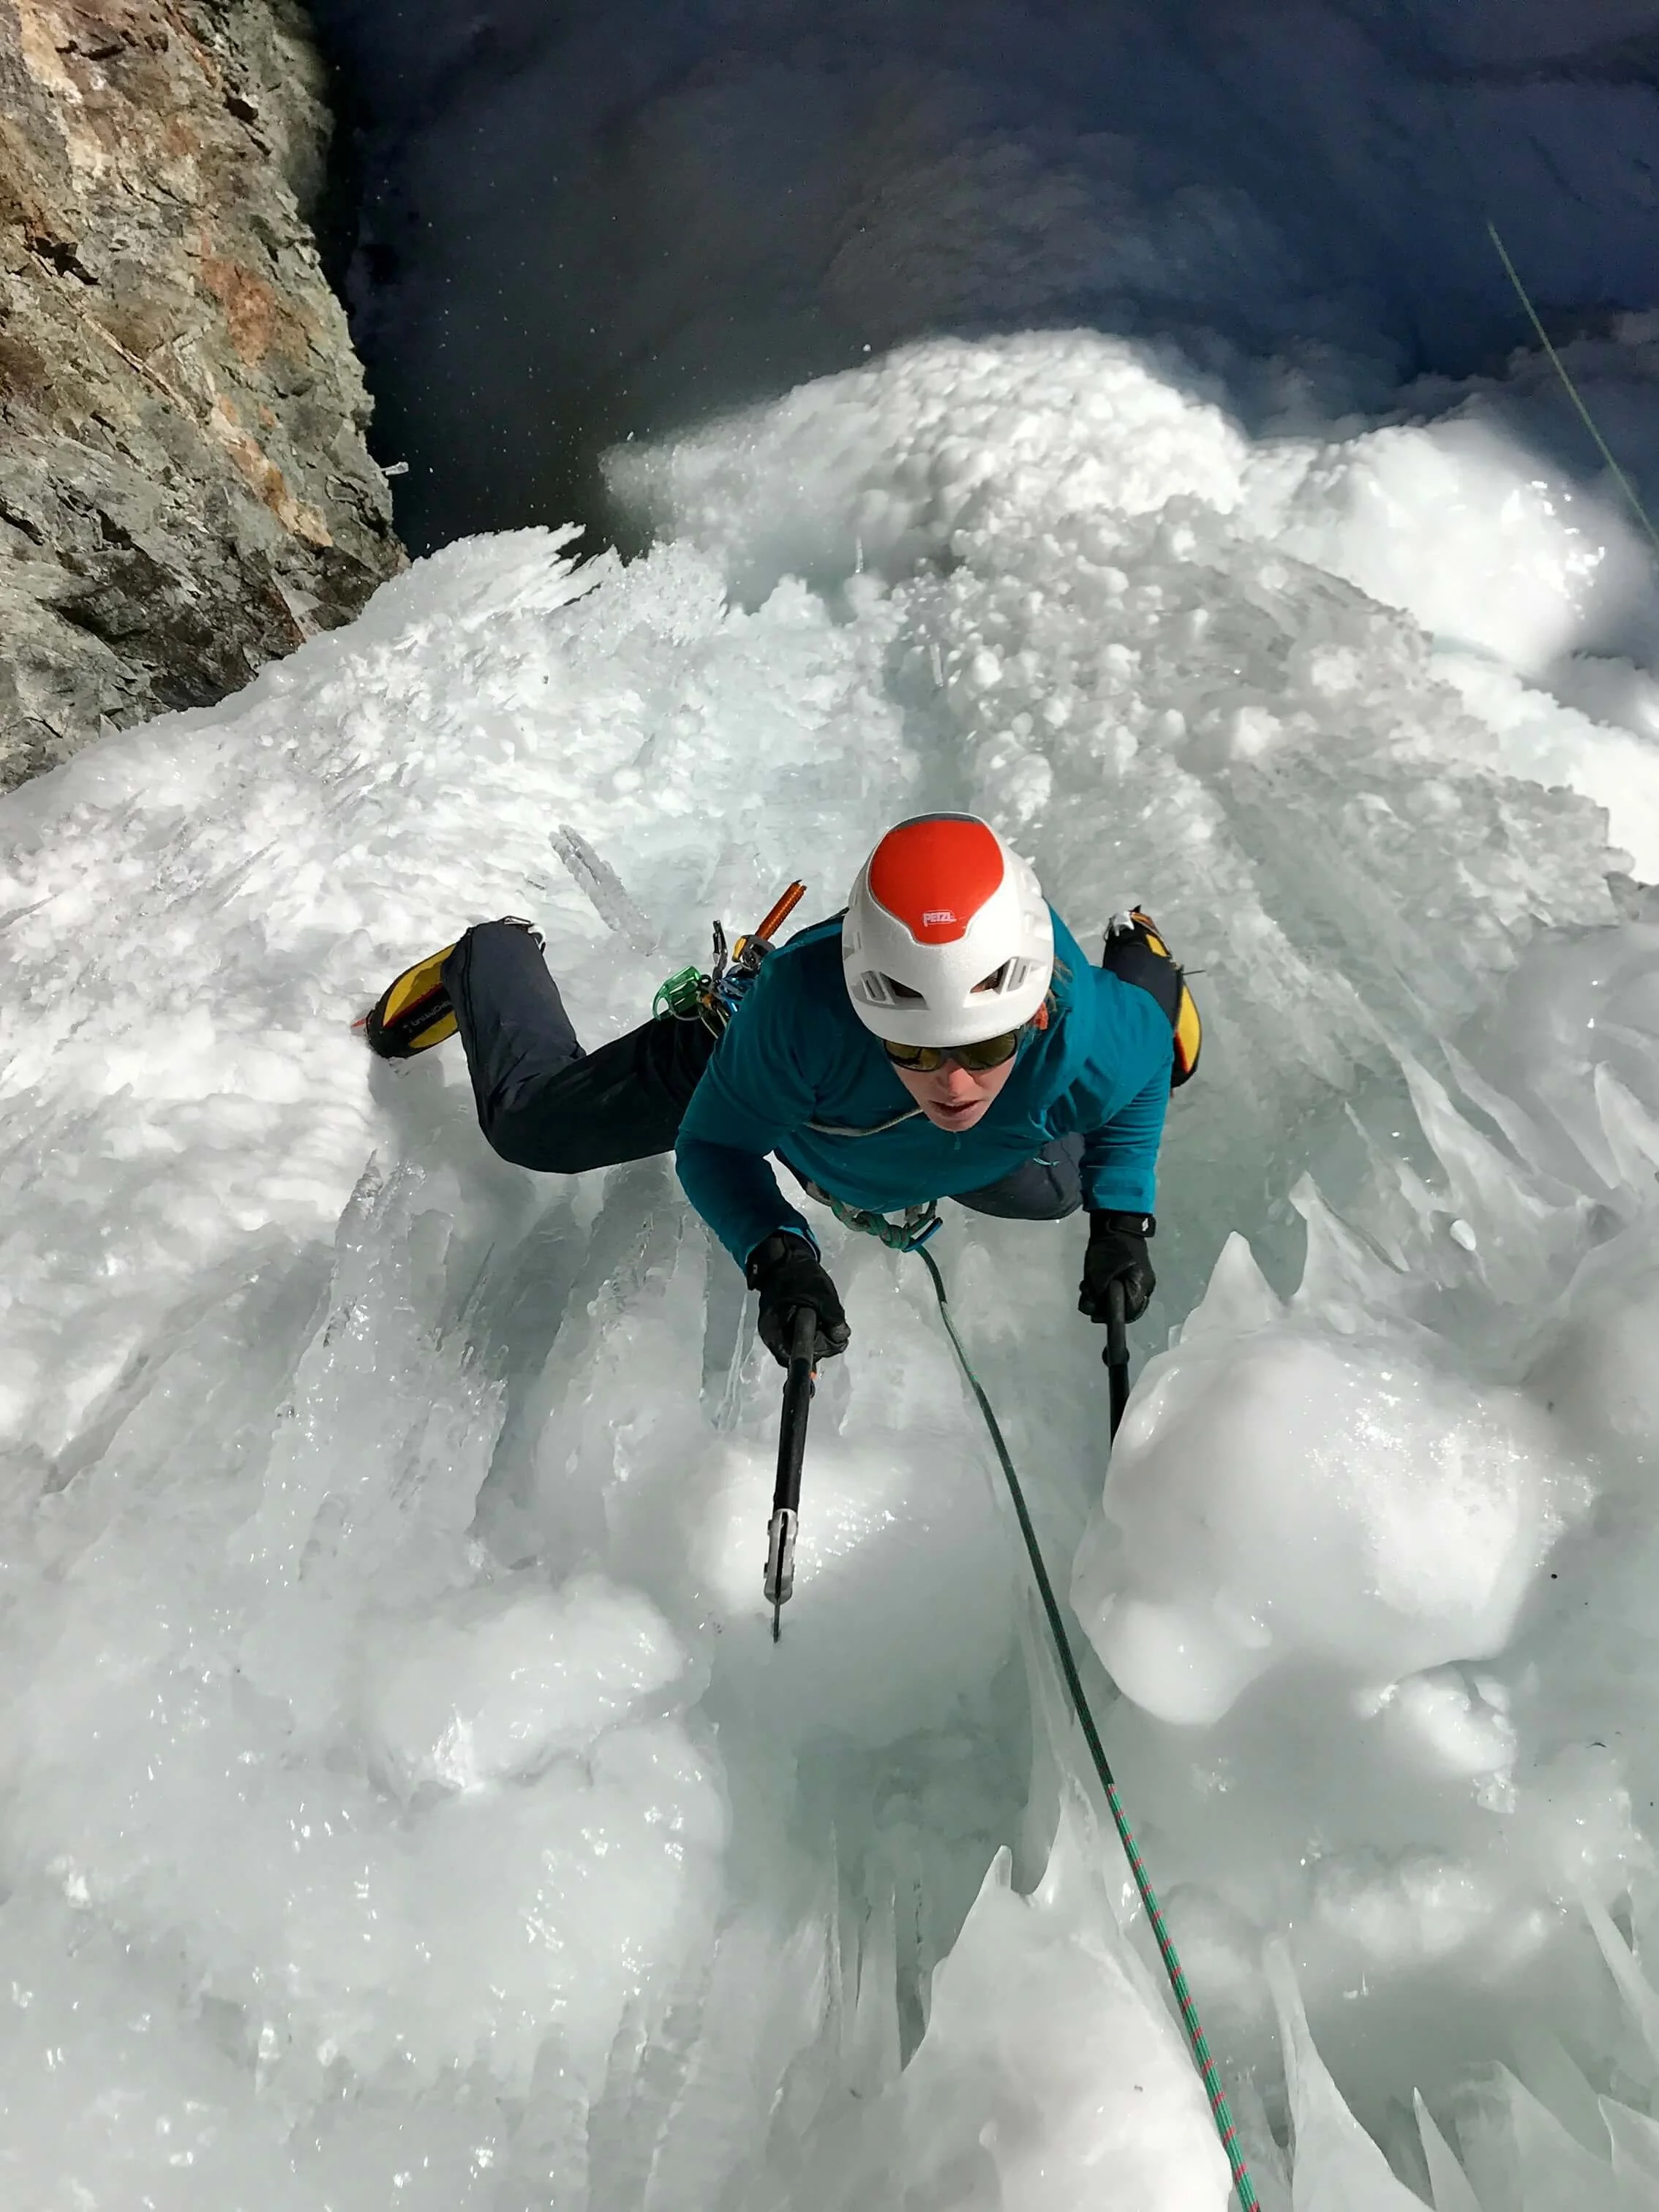
Swinging your ice tools can be one of the most physically fatiguing components of ice climbing, requiring upper body power, core stability and shoulder endurance. More precise swings means less ice displacement, more accuracy, and less energy expenditure. Here are key takeaways for more efficient ice tool swinging:
Take your time to find the best micro features to place your picks: pay attention to the color of the ice, subtle concavities and quality indicators such as thickness, layering, bonding, chandeliers, etc.
Engage and stabilize your core, squeezing your glutes will push your pelvis forward towards the ice. Slightly arch your lower back so you pull your chest away from the ice and have clear space in front of you for your elbow to initiate the swing. Bringing you center of mass over the frontpoints of your crampons will help you use your core muscles to generate power during the swing while staying well balanced.
With modern ice tools, especially those with pick weights, you should be able to generate most of the swinging power from just the wrist. For a more powerful swing in harder ice, hinging from the elbow as well adds substatial speed to the arc of the swing. Avoid chopping motions, such as only hinging from either the elbow or shoulder, it’s fatiguing, lacks precision, and does not generate a lot of speed for good penetration.
Ok, this one is a bit tricky and nuanced: you want to swing above your head and get more efficiency thru more upward progress but you don’t want to OVEREXTEND yourself. Maintain a slight bend in your arm - you shouldn’t feel a stretch in your latissimus dorsi.
Nobody likes getting the screaming barfies so keep a looser-than-you-think grip on the tools to encourage blood flow to your hands. If you’re having trouble remembering and find yourself consistently gripping tightly, try unwrapping your thumb from the handle and place it facing up the shaft - this should automatically create a looser grip.
How does your body position affect your stability?
Once you’re ready to move your feet there’s an order of operations that will serve you well as a guideline, not a rule though so don’t let yourself get boxed in and let the terrain dictate your movement.
Aim to align your body underneath your upper ice tool, this often means moving the outer leg first. It takes less energy to maintain your balance the closer your legs are so bring that outer leg into the center rather than upwards as the first step. If the tool is very far off to the side you may have to shuffle even further until your underneath the tool and can begin upward kicks. Keep your legs close together when making upward progress, it’s easier to shift weight between each leg. Without climbing up too high on the ice tools (a good guideline is the back of your elbow shouldn’t protrude past your kidneys - this keeps you from leveraging outward on the ice tool), kick your feet out to the side, about shoulder width apart.
Smaller steps take less energy, don’t rush the movement and take those incremental steps instead. This is especially important when pulling over bulges.
What about staggered feet? Sometimes good foot placements aren’t at the same height, that’s ok - it’s why the aforementioned bulletpoints are guidelines not rules. If one foot is elevated, swing the OPPOSITE hand, this allows you to use a diagonal position with your body to maintain stability. Instead of pushing the center of your pelvis towards the ice, rotate at the hips. Left foot elevated = right hip towards the ice = right arm swinging.
Looking for more advice on ice climbing techniques?
We’re proud to have been instructing ice climbing courses and private guided ice climbing trips on backcountry routes in the San Juan mountains for 30 years! Let us help you learn ice climbing for the first time or improve you technique so you can be an efficient and confident ice climber. We’ve seen it repeatedly, instruction from an experienced and certified guide allows climbers to accelerate their progression. Every day is customized to your skill level and goals. Our guides will help you:
Refine your movement before habits set in
Understand how to save energy with smart body positioning
Avoid getting pumped on steeper routes
Gain confidence to push into harder grades